Dr. V.'s Musings
May 12, 2017
Building a TV Studio
Building a Television studio takes a little bit of work. But it's nowhere near as hard as it used to be. I know, I've been dabbling in TV and Video since I started High School - which was in 1972. Back then we saved video on reel-to-reel videotape that was 1 inch wide. Cameras and TVs still had actual vacuum tubes. And the entire process was analog. I also had an opportunity back then to work at a local television station through Junior Achievement where I learned about things like TelePrompTers and ChromaKey (again, all analog).
Needless to say, one needed copious amounts of money to set up a TV studio back then. Today I've done so in my own home for less than $1,000 (not counting my iPad). I'm going to share with you how I did it so that you can too. And possibly for considerably less money than I did. The basic components of my studio are:
- Camera
- Microphone(s)
- Lights
- Green Screen (optional)
- Computer
- Software
- iPad Pro & Pencil (optional)
- Teleprompter (optional)
Camera
Most laptops and phones have cameras in them nowadays, and you can certainly do some amazing things with them. So if you want to get started that way, then go for it. Prior to setting up my TV studio I used a Canon camcorder along with a teleprompter I built and my iPad to record my lectures for online learning. It's a great camera, however there's no good way to connect it to a computer as a camera that can be accessed by studio software. I looked into an HDMI digital converter to do that, but buying a high-end web cam ended up being cheaper and simpler/more reliable. I went with the Logitech C922 Pro Stream webcam, for about $100. (http://www.logitech.com/en-us/product/c922-pro-stream-webcam) It has worked quite well for me. It is slightly wide angle, so you can easily fit two people on screen if you want.
Microphone(s)
The Logitech camera has built in microphones which work reasonably well in a normal webcam configuration, however I use my camera with a teleprompter, which means that the camera is behind a piece of glass and that interferes with its ability to pick up my voice. For "talking head" videos the best approach is to use lavalier mics which clip on to you and are designed for voice recording. I bought two microphones just because they are different prices and I wanted to compare them. One of them came with an adapter for plugging two microphones in at the same time and so I decided to keep them both in case I ever want to record two people at once. If you don't want to buy a microphone, I found a pretty good alternative before I bought mine that costs essentially nothing. I used my iPhone earbuds tucked into my shirt with the microphone (the volume controller) hanging out just below camera view. Worked like a charm.
The two microphones I purchased are:
- iRig Mic Lav (http://irigmiclav.com)
- Insignia Clip-On Mic NS-MCMIC10 (https://www.insigniaproducts.com/pdp/NS-MCMIC10/5086535)
Lights
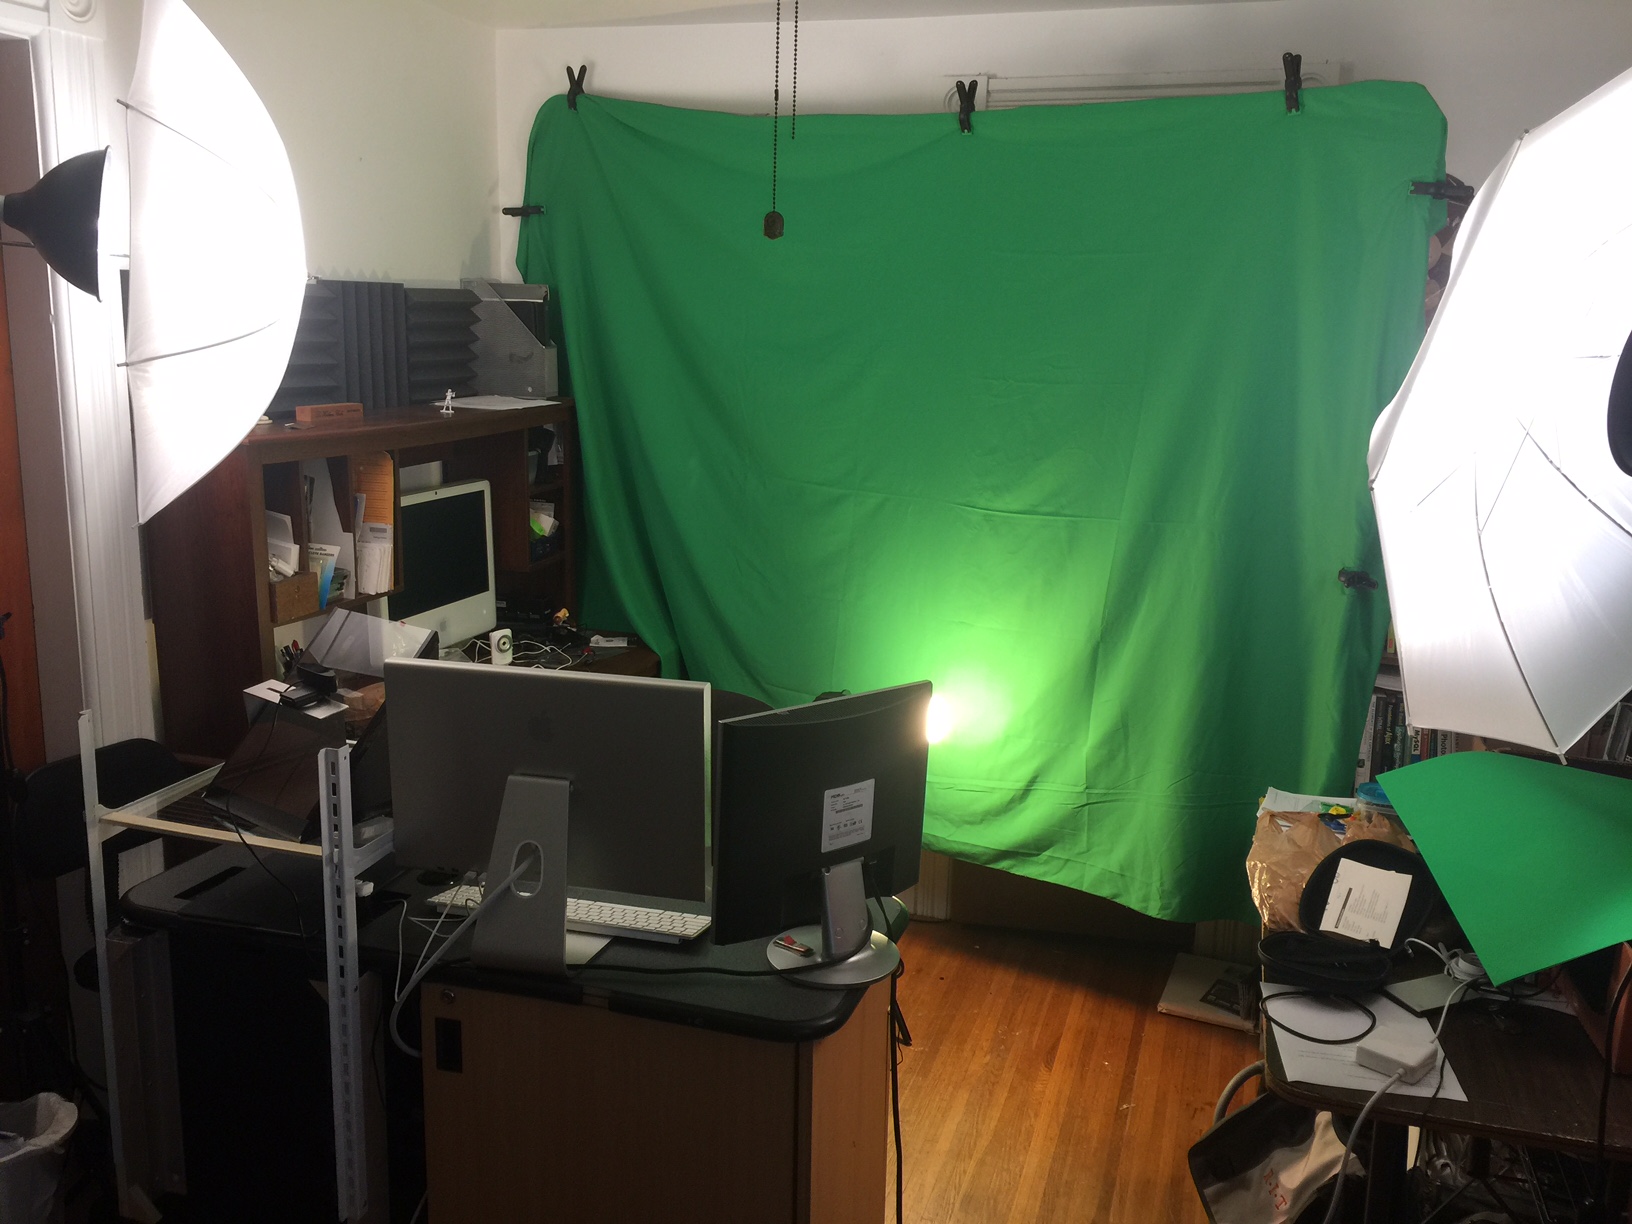
Possibly the biggest difference between "home movies" and professional video is the correct use of professional lighting. "Professional" doesn't necessarily mean expensive. I'm using a basic three-point lighting setup with a combination of tungsten (front with umbrellas) and fluorescent (back) lights. (You can watch my lecture on lighting if you want to learn how to do three-point lighting.) You can buy these kits for between $50 and $100. Just search for "photographic lighting kit." Umbrellas "soften" and diffuse the light making the setup very easy and tolerant.
Green Screen (optional)
You don't need a green screen (or if you prefer, a blue screen) for a home studio, but it's very handy if, like me, you use your studio for multiple purposes and want different backgrounds for each. When I started shooting the videos for my online courses a few years ago I did it in my living room with the antique double paneled doors behind me. This looked great, but eventually my wife wanted our living room back. I took a photo of the doors and using chromakey and a green screen I put them behind me digitally so the videos all look the same. Green screens are usually used with video because digital cameras have twice as many green sensors as red or blue, so green is very reliably captured. People tend not to wear a lot of bright green, and skin tones have very little green, so the key is usually very good. (Blue was traditionally used in movies because film was more sensitive to blue.) You can improvise a green screen (I've done that), paint a wall with the right color paint, or just order a pre-made green screen like I did. They are relatively inexpensive. Mine (https://www.amazon.com/gp/product/B01HBSB7XC/) was $20 via Amazon Prime.
Computer
If you have a computer, then by all means use that. I used my 2013 MacBook Pro originally, and when I upgraded to a new MacBook Pro I decided to also get a new standalone computer for my studio so that it would always be set up and ready to go. I went with a Mac Mini (Model: MGEN2LL/A Intel Core i5 (2.6GHz) - 8GB Memory - 1TB Hard Drive, $600). I already had a couple of spare monitors, so I didn't need that, but the keyboards and mice I had were kind of old and large, so I picked up an open box Apple keyboard for $40 and an inexpensive ($8) scroll-wheel mouse. If you prefer Windows, then by all means go that route. The software and camera work on Windows just fine from what I have heard.
Software
The software is what turns all of this equipment into a TV studio. There is commercial software available - relatively expensive software. After looking around, a colleague of mine suggested I look at OBS Studio (https://obsproject.com). It's open source and free, so that sounded like a good place to start and I've found it to be quite functional and easy to use. Keep in mind that I've been doing video a long time and even wrote and teach a video production course, so your mileage may vary. But my hunch is that you won't have too much trouble learning it either. There are lots of video tutorials on how to use it on YouTube and elsewhere. Who knows, maybe I'll make one someday too.
OBS Studio lets you combine multiple video sources, including software running on your computer, webcams, images, etc. into a live stream that you can publish via YouTube or Twitch. It does the Chromakey for you and lets you set up and switch between different "scenes" so that you can change the composition, sources, and layout while you broadcast. You can also record video either as a standalone activity, or while streaming. I'm sure there is more, but it does everything I wanted and does it well.
iPad Pro & Pencil (optional)
I use my iPad for two things in my studio. First, as part of my teleprompter when recording online lectures. This is very helpful because by reading what you're saying you can go a little faster, skip all the "ums" and "uhs" of normal speech making the lecture more efficient for the learner. And by using a teleprompter, you are looking directly into the camera - and so directly at your viewer - which is a good thing. The other thing I'm experimenting with doing with my iPad is using it as a live whiteboard (with the pencil). Right now I'm using OBS to capture a Photoshop window that I'm drawing in and Astropad (http://astropad.com) to turn my iPad into a graphics tablet for drawing in that window. All I've done is experiment a bit, so keep an eye out to see how it works.
Teleprompter (optional)
As I explained when talking about my iPad, a teleprompter can be very handy. I built my first one before the iPad came out, so it was very much like the ones I used way back high school. A monitor, mirror, and pane of glass (or acrylic). You needed the mirror top flip the monitor because the glass flips it again. With the advent of the iPad and teleprompter software (I use dv Prompter By Datavideo - https://itunes.apple.com/us/app/dv-prompter/id410825555) that can flip the text on screen the mirror became unnecessary, so I designed a new teleprompter for my new studio. I cut it out of black foam core and it worked well, so now I've tightened up the design and LASER cut a new one out of plywood. I'll probably post some directions on that in the near future and who knows, may even sell kits if there is demand, because not everyone has access to a LASER cutter.